
On 7th August 2014 I would embark on a trip to Normandy, which would see me head to Villers-Bocage to follow on the “Trail of the Tiger”. Covering the events surrounding Michael Wittmann’s entry into the town, I have put together a small selection of photographs marking the key points along the Tiger’s route into the town, as well as a couple of short videos where I take the same road that was traversed just over seventy years earlier.
Views from Wittmann’s entry point onto the RN 175 (now the D 675)
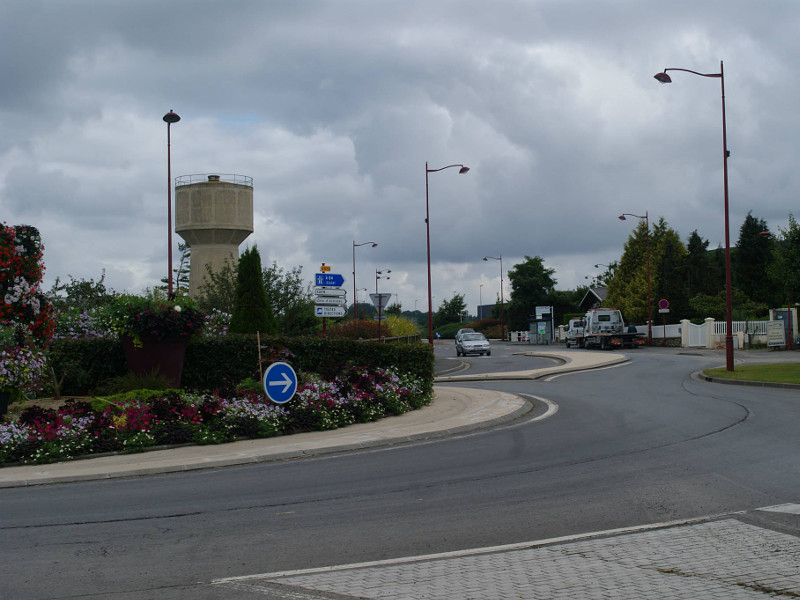
The route départementale D 675 connects Villers-Bocage to the port city of Caen to the east-northeast, and is a single-lane carriageway as it was back in 1944. Following the construction of the Autoroute A 84, the D 675 is now used to carry mainly local traffic. This means that the road is pretty much the same today as it would have been in 1944, with the exception of postwar additions such as the branches off and onto the A 84 and the roundabout at the Tilly Junction, previously just a fork in the road.
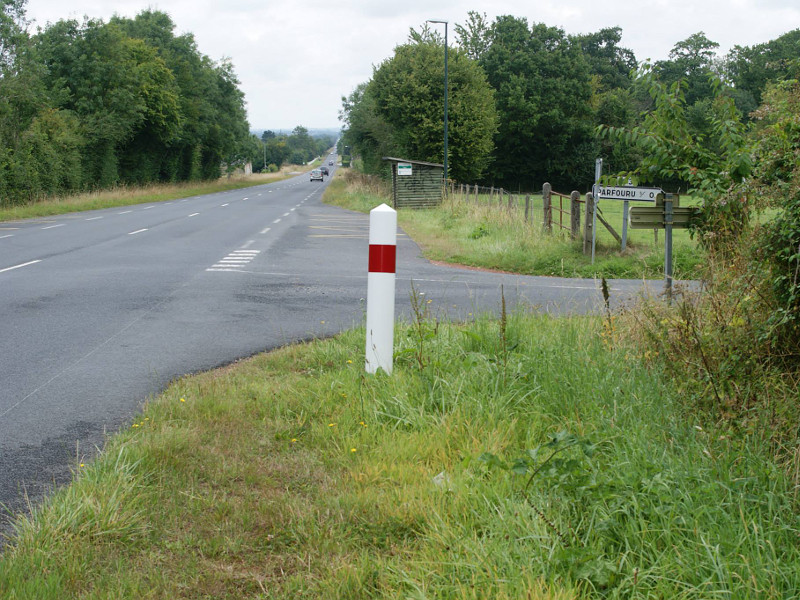
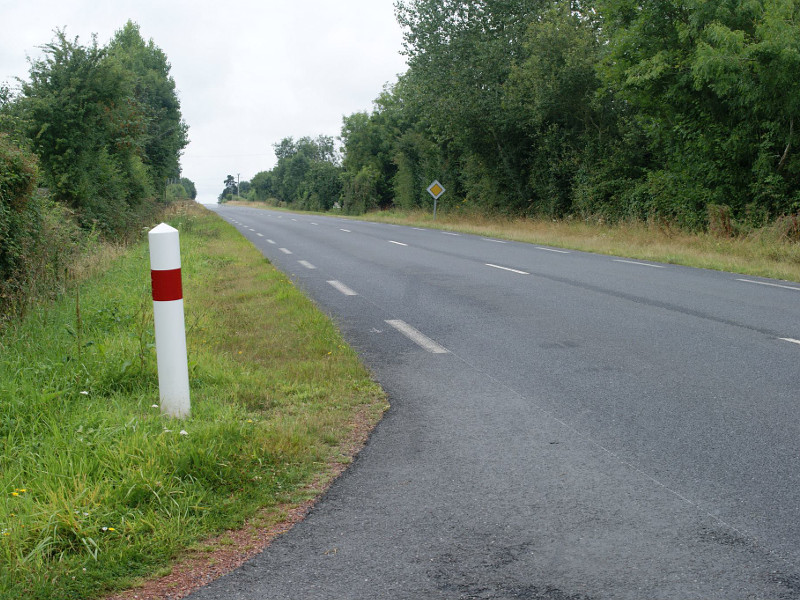
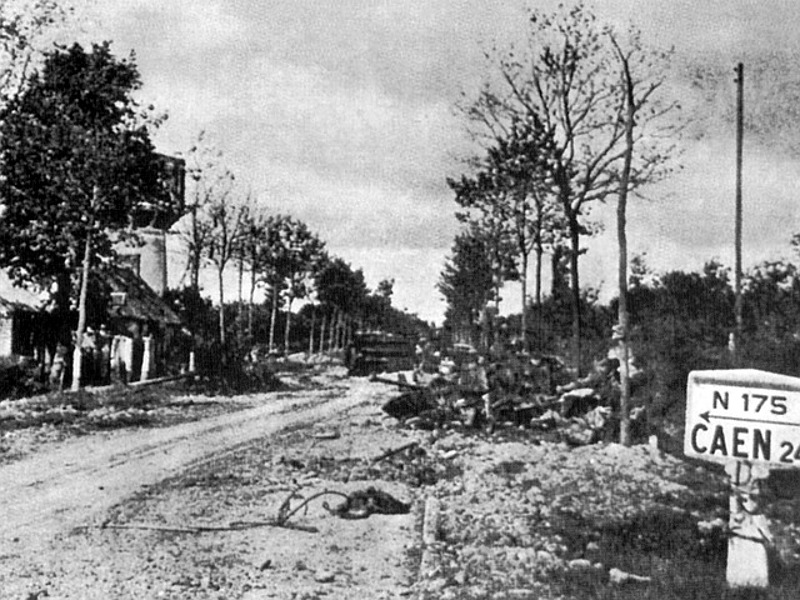
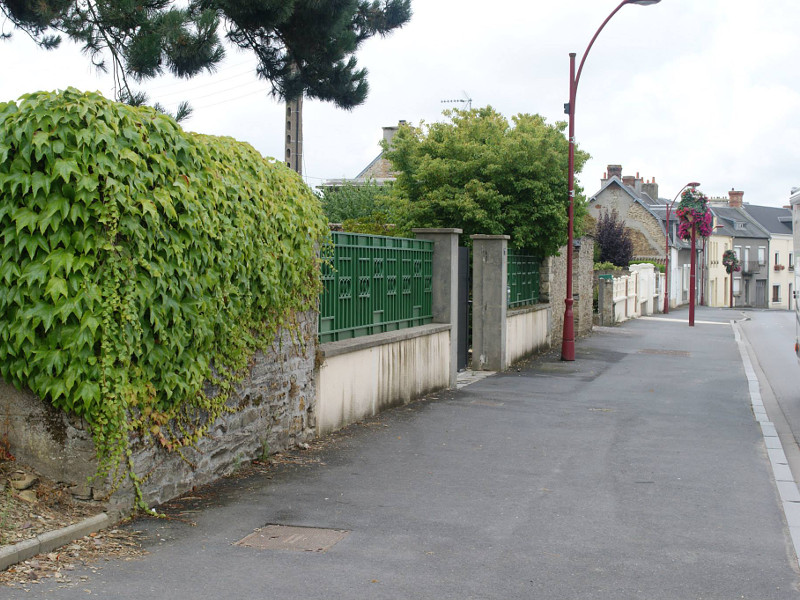
These first two images are of the D 675 from the junction towards Parfouru-sur-Odon, where the three Tigers belonging to Wittmann’s platoon would make their first showing on the morning of 13th June 1944. Here Wittmann would encounter two vehicles belonging to the 4th County of London Yeomanry, the Firefly nicknamed “Blondie” and a Mk. IV Cromwell.
While Wittmann would turn left in towards the town after destroying these two vehicles, the other two Tigers belonging to SS-Untersturmführer Georg Hantusch and SS-Oberscharführer Jürgen Brandt would head down the then RN 175 towards Point 213.
 |
 |
Wittmann’s path into Villers-Bocage
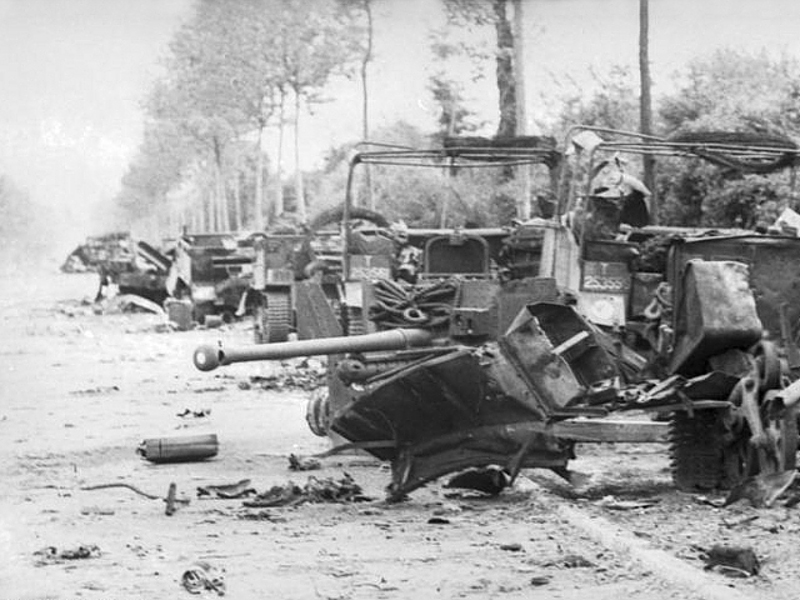
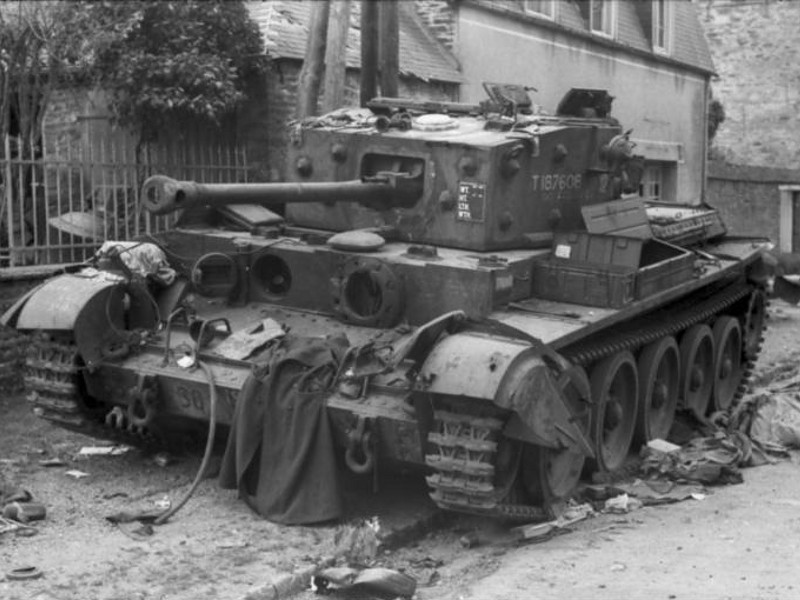
Leaving the wrecks of the Firefly “Blondie” and the first Cromwell behind him, Wittmann would roll down the gentle decline towards the town where he encountered the stationary vehicles belonging to the 1st Rifle Brigade. The following two images show the wrecks of the half-tracks and light vehicles taken after the battle on June 13th 1944, and how the road looks today.
 |
 |
With many of the vehicles being unmanned and unable to escape, Wittmann would destroy the column with heavy machine-gun fire – leaving a trail of destruction in his wake. he would then press on towards the town and the Tilly Junction, encountering the Stuart light tanks of the 4CLY’s Reconnaissance Troop. The video below covers the drive from Wittmann’s approximate starting point to just beyond the Tilly Junction.
[youtube=http://www.youtube.com/watch?v=_MRPIFhDW0c&w=640&h=360]
Covering around three kilometres, the drive from Michael Wittmann’s starting point to the Tilly Junction
The Tilly Junction, and the skirmish with the Stuarts
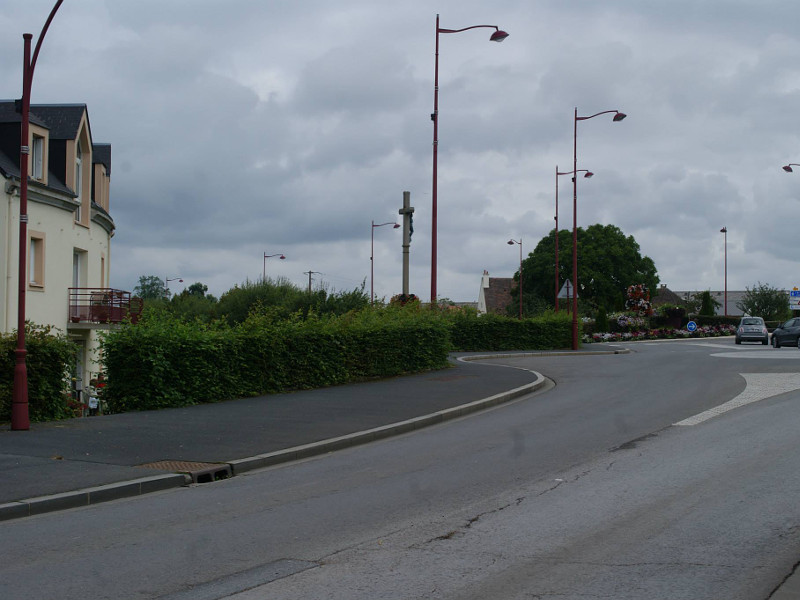
As you can see in both the video and the recent image below, the Tilly Junction has been completely rebuilt and reformed, with a new roundabout in place. The Calvary standing at the centre of the town still stands in the same place, and just beyond that on the road into the centre of town – Rue Georges Clemenceau – Wittmann would encounter the three M3 Stuarts parked by the side of the road.
 |
 |
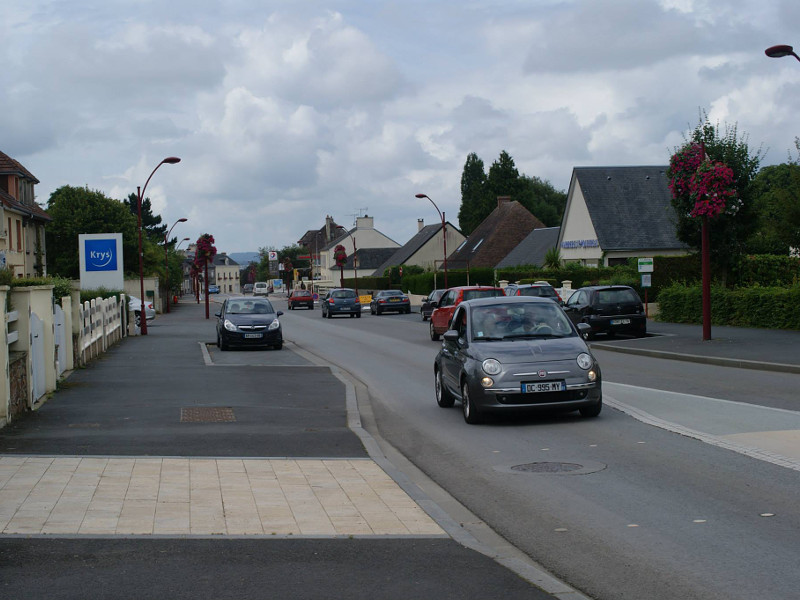
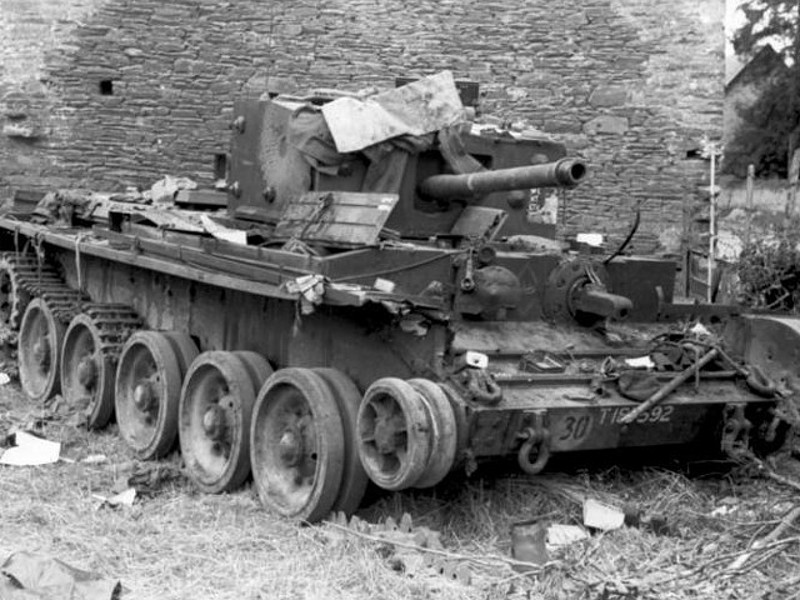
The thinly-armoured Stuarts would bravely attempt to obstruct the advancing Tiger, but their resistance would prove futile in the face of the German Panzer’s superior firepower. All three of the lighter vehicles would be quickly put out of action, as Wittmann continued down the gently declining Rue Georges Clemenceau towards the centre of the town.
 |
 |
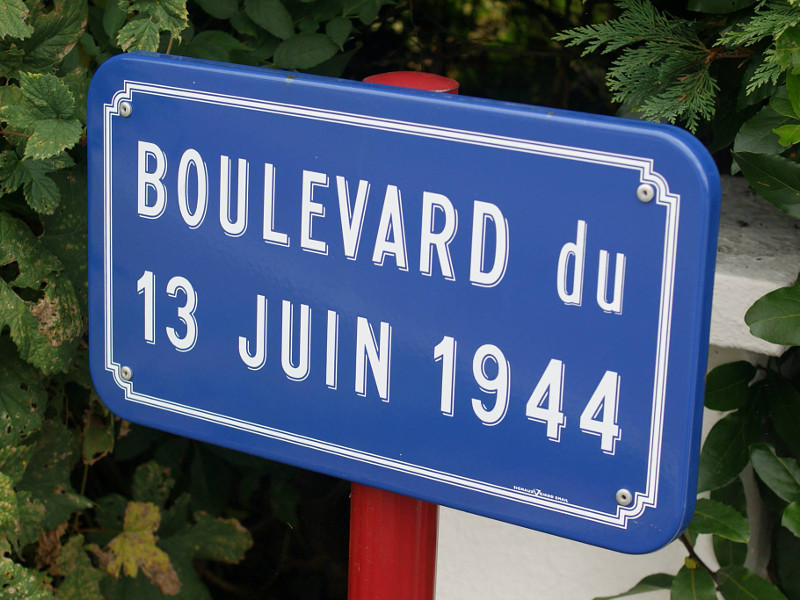
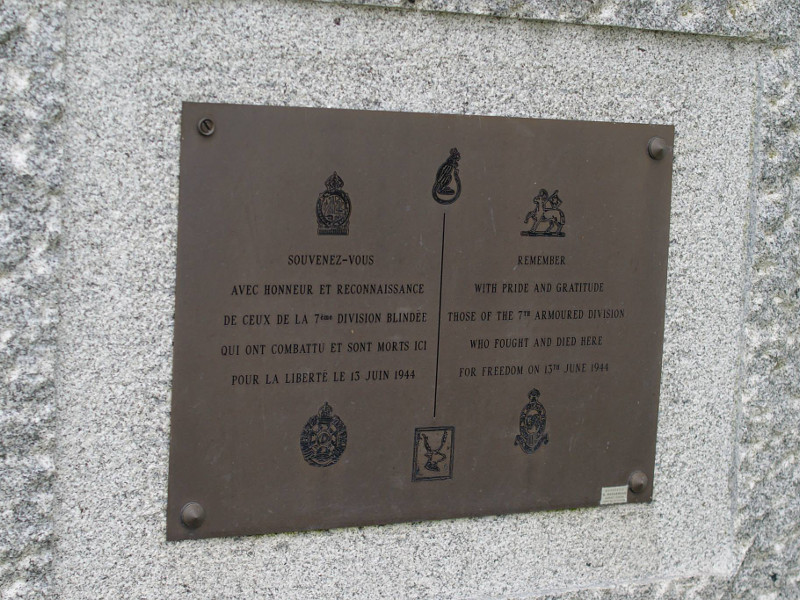
As you enter the roundabout at the Tilly Junction, there is a new road to the left marking the battle – Boulevard du 13 Juin 1944. By the side of the intersection of this road and the rue Georges Clemenceau is a small and well-tended memorial, marking the action of the 7th Armoured Division on the day of Michael Wittmann’s advance into the town.
 |
 |
From the Tilly Junction into the centre of Villers-Bocage
Leaving the three disabled Stuarts in his wake, Wittmann would continue on his seemingly relentless journey down the rue Georges Clemenceau, encountering the four Cromwells belonging to the regimental headquarters of the 4CLY. The front vehicle belonging to Arthur Carr would be hit first as it attempted to reverse out of the Tiger’s path, and would be quickly followed by the Cromwell commanded by Lieutenant John L. Cloudsley-Thompson, which would be knocked out close to a wall now adjacent to the newly built Carrefour supermarket.
 |
 |
Amidst the smoke and confusion created by the Tiger’s assault, the third Cromwell commanded by Captain Patrick Dyas would manage to reverse into an adjacent garden – but lacking his temporarily absent gunner Dyas would be forced to watch helplessly as the Tiger trundled past him towards his next target – the fourth Cromwell belonging to RSM Gerald Holloway.
 |
 |
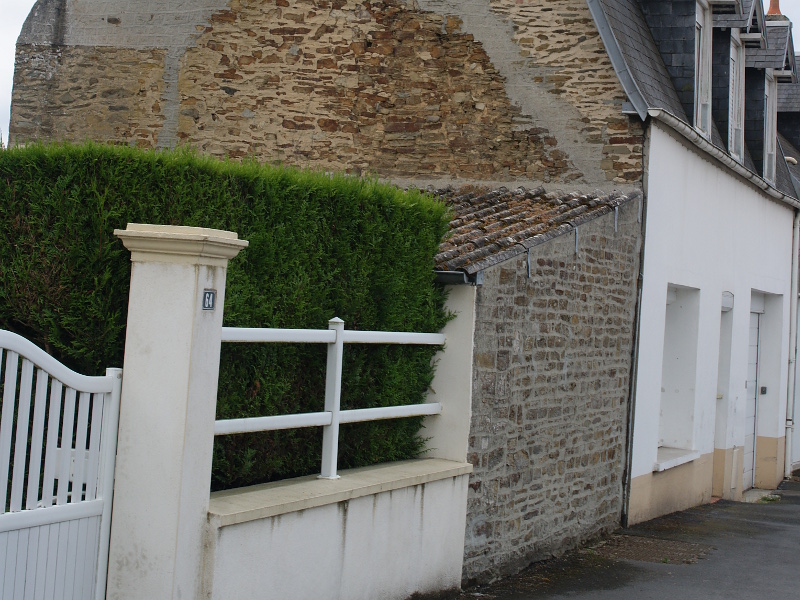
RSM Holloway’s Cromwell would be left disabled outside the first house after passing the low white fences, which can easily be identified today by the side brickwork. The house is one of the few that would escape extensive damage, as it looks much the same as it did on the day when the Cromwell was brought to a halt by Wittmann’s Tiger.
 |
 |
Towards the town centre
Wittmann’s next victims would be the two Observation Post (OP) vehicles of 5th Royal Horse Artillery belonging to Captain Paddy Victory and Major Dennis Wells, after which he would continue right into the centre of town and onto Rue Pasteur before being forced to turn back at what is now Place du Maréchal Leclerc. The video below takes us from the Tilly Junction and into the centre of town, just before the point where Wittmann would turn his Tiger around having spotted the Firefly of Sergeant Stan Lockwood of 4CLY’s “B” Squadron.
[youtube=http://www.youtube.com/watch?v=my_WGrWkoWs&w=640&h=360]
The short drive from the Tilly Junction to the centre of town, just before Place du Maréchal Leclerc
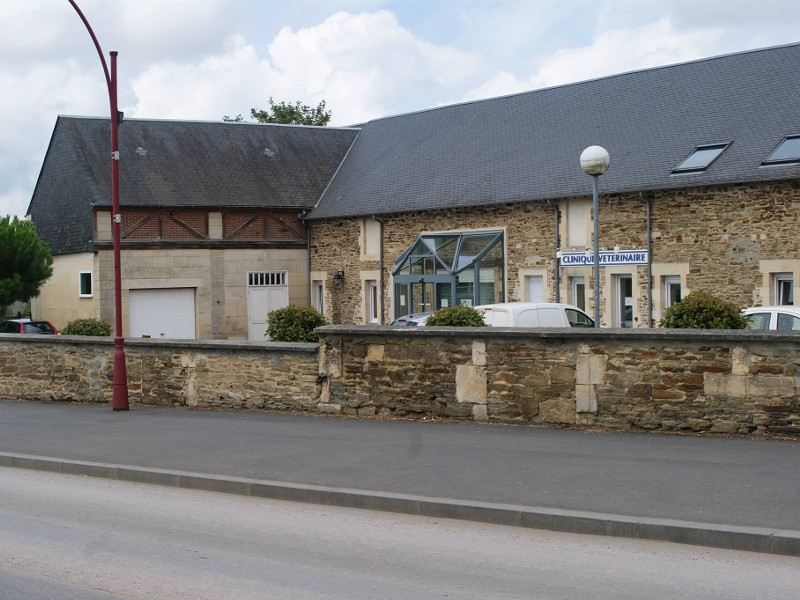
Wittmann’s last victim of the morning would be the Cromwell of Captain Dyas, who before being hit would manage to fire a couple of shots at the German Panzer. Dyas’s tank would be abandoned in front of an old farmhouse, which was one of the many buildings subsequently demolished. While the main building no longer exists, the barn was later converted into a one-story building which is now a veterinary surgery.
 |
 |
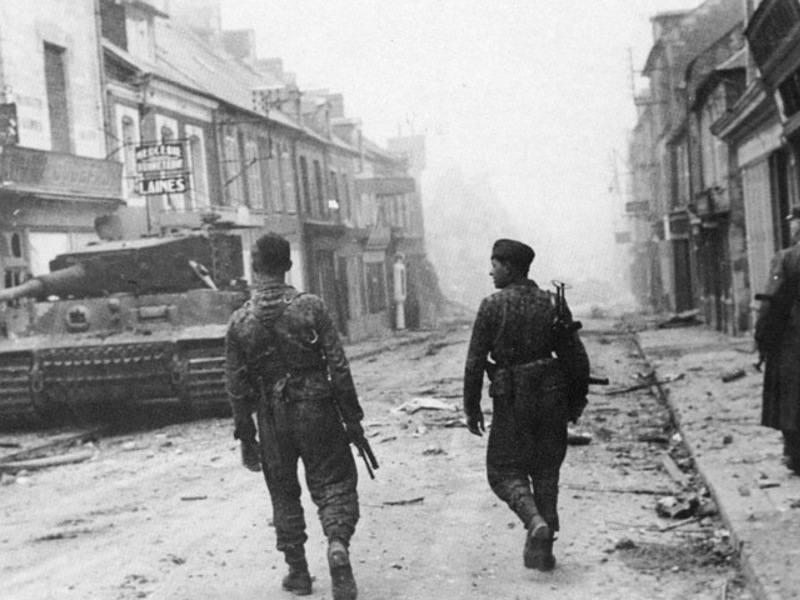
Having turned around on Rue Pasteur to head back out of town Wittmann would be hit by Sgt. Lockwood’s Firefly, and with his Tiger coming to a halt on the high street the Panzer commander would exit with his crew on foot. His hastily abandoned vehicle would be left in front of the Huet-Godefroy clothes store, part of a parade of shops that would be destroyed during the shelling of the town and then demolished after the war.
 |
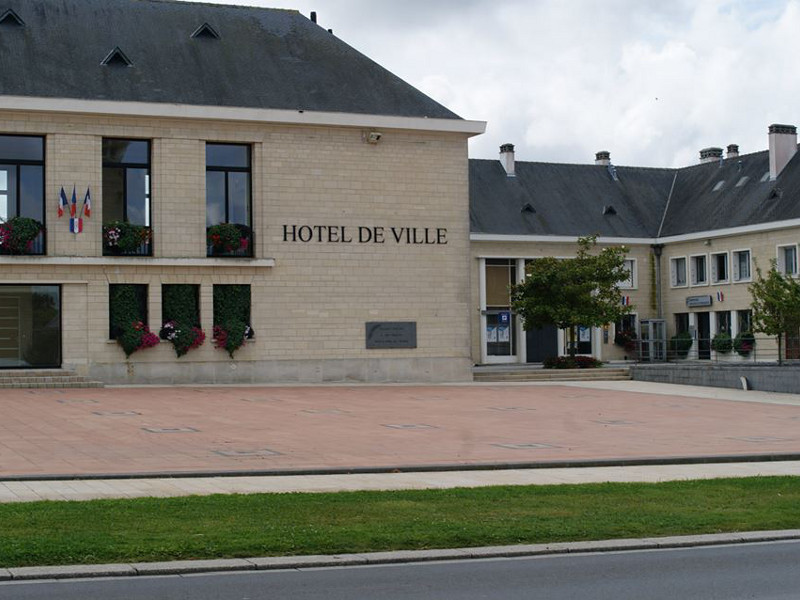 |
Today, the site where the shops once stood is occupied by the new town hall on Place du Maréchal Leclerc, which was opened to the public in 1960.