
Having destroyed the three M3A3 Stuarts belonging to the 4CLY’s Reconnaissance Troop at the Tilly Junction, Michael Wittmann was confident that there were more rich pickings to come. The enemy had been clearly been shaken by the speed and ferocity of the Tiger’s attack; so long as this situation continued, Wittmann held the advantage.
With the British formations in a total state of panic and with no obvious resistance in sight, the German Panzer continued on its advance beyond the Tilly Junction, and headed towards the town.
Wittmann continues his advance
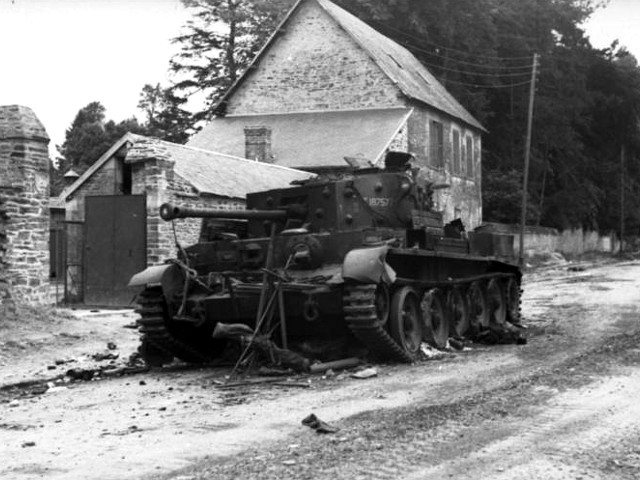
On entering Villers-Bocage, Wittmann then encountered the vehicles belonging to Regimental HQ. Like the Stuarts just moments earlier, the four Cromwells situated just beyond the Tilly Junction were no match for the Tiger’s cannon at such short range. The British crews wouldn’t even have time to panic as the German Panzer appeared like some apparition in front of them.
The first Cromwell belonging to Major Arthur Carr was hit as it attempted to back away to safety, while those belonging to Lieutenant John L. Cloudsley-Thompson and RSM Gerald Holloway would have no means of escape. Trapped in the street, it was simply a case of waiting for the inevitable. According to the account written after the battle by “B” Sqn. leader Major “Ibbie” Aird, Carr’s gunner had managed to get in a quick shot at the Tiger, only to see the 75mm shell bounce harmlessly off the German vehicle. “Heartbreaking and frightening, the shots failed to penetrate the side armour even at this ridiculous range”.(1)
It was a desperate situation for the four RHQ vehicles. Fighting back had proved fruitless, and the awkward Cromwell’s painfully slow mobility in reverse gear would make any attempt at making an escape next to impossible. It is difficult to imagine the sense of terror and panic that must have overwhelmed the British crews, trapped in their vulnerable vehicles on the narrow road and unable to move.
Having seen his shot bounce off the advancing Tiger, it must have been a terrifying sight facing Major Carr. The Cromwell’s crew would have very little time to react before Wittmann’s gunner found his range, knocking out the British vehicle with one of its 88m shells. The Tiger’s cannon was then quickly turned towards Cloudsley-Thompson’s Cromwell, with the same result. RSM Holloway would desperately try to get his tank out of the Tiger’s path, but it too was quickly reduced to a burning wreck.
Amidst the confusion, Cloudsley-Thompson’s crew had managed to escape their burning vehicle. At the same time, the fourth Cromwell commanded by 4CLY’s adjutant Captain Patrick Dyas had been able to reverse off the road and into an adjacent garden. With his view obscured by the billowing clouds of black smoke, Wittmann wouldn’t notice Dyas’s vehicle crank into gear before quietly slipping out of his firing line.
Cromwells set ablaze
Moving onto Rue Georges Clemenceau, the Tiger next encountered two decoy Observation Post (OP) vehicles belonging to the 5th Royal Horse Artillery, both of which had the misfortune to be in the wrong place at the wrong time. The Cromwell of Captain Paddy Victory was quickly sent up in smoke, while the Sherman belonging to Major Dennis Wells – which was “armed” with a long piece of wood instead of a main gun, was also added to the Tiger’s trail of destruction.
Wittmann had no idea that these two vehicles had been unarmed, but they were just two more tanks to add to the morning’s already impressive statistics. Amidst the smoke and fire created by the burning RHQ vehicles, the scout car belonging to Lieutenant Charles Pearce managed to escape the pandemonium, bypassing Wittmann and heading west to where “B” Squadron 4CLY were positioned.
 |
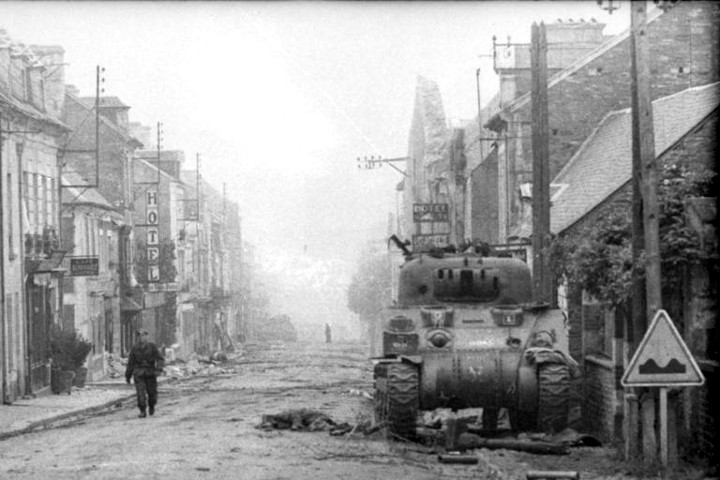 |
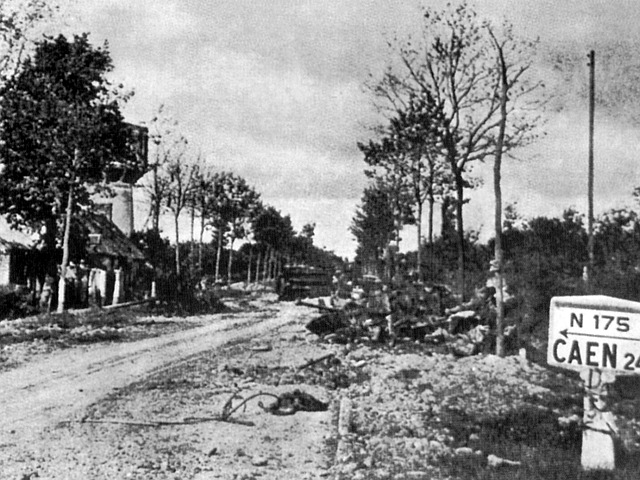
The German Panzer relentlessly continued its advance, rolling westwards on the gently sloping road towards the centre of Villers-Bocage. Only a small number of enemy vehicles had managed to escape the initial barrage, among them Pat Dyas’s Cromwell; by this time the more powerful “B” Squadron 4CLY, located west of Villers, had been alerted to the Tiger’s presence by Lieutenant Pearce.
As Wittmann’s Tiger now moved more cautiously towards the centre of town, it passed the side street where the Cromwell of Captain Dyas had been lurking. Shortly after seeing the German vehicle rumble past up the western end of Rue Georges Clémenceau towards Rue Pasteur, Dyas rolled out after it – a scene witnessed by Lieutenant Cloudsley-Thompson, whose own command vehicle had been one of the the three other Cromwells put out of commission by Wittmann’s Tiger.
Toilet breaks and close shaves
Dyas’s decision to allow the Tiger to pass by without taking a shot from his concealed position might have seemed curious, but on a day that had seen a mix of tragedy and comedy it would later be revealed that he had been unable to take a shot on account of his gunner disappearing for a toilet break. It must have been immensely frustrating for Dyas to watch the German tank roll by, with its sensitive tracks exposed and there for the taking.
As Cloudsley-Thompson nervously watched Dyas slowly and carefully follow the Tiger up the road, Wittmann’s next encounter was with a Sherman Firefly belonging to the 4CLY’s “B” Squadron, commanded by Sergeant Stan Lockwood which had turned into Rue Georges Clémenceau from the Place Jeanne d’Arc having encountered the desperate Lieutenant Pearce. Having sustained a light hit from the 17-pdr cannon of Lockwood’s Firefly, Wittmann half-turned into a section of wall, causing the rubble to fall down upon the British vehicle.
As Lockwood struggled to free his tank from the rubble, Wittmann made good his escape. Taking on Cromwells, Stuarts and lightly-protected half-tracks was one thing; facing up to the Firefly’s more potent seventeen-pound gun from close range was a different proposition altogether.
The one-sided duel with Pat Dyas
Amidst this confusion Captain Dyas, who had up to this point kept his Cromwell at a safe distance in following Wittmann’s Tiger, seized the opportunity to have a crack at his much larger adversary from around seventy yards. The brave Dyas did manage to get two 75mm shots off against the massive German vehicle, but instead of claiming his prize he saw both shells bounce harmlessly off the Tiger’s thick armour.
The Tiger was now aware of the presence of the British tank, and Dyas would not get another opportunity. With Wittmann now aware of the danger ahead of him, the Tiger’s massive gun quickly turned itself on the now helpless and hopelessly exposed Cromwell. An accurate shot from the German Panzer succeeded in blowing Dyas clean out of his cupola, leaving him dazed on the side of the road with serious facial lacerations. His driver and gunner were not so fortunate.
 |
 |
Having made his escape from his stricken Cromwell, Dyas made his way to RSM Holloway’s burning vehicle, which appeared to still have a working radio. As Wittmann was continuing his journey into the centre of the town, Dyas was able to make contact “B” Sqn. and Major Aird.(2)
With the battle continuing to blaze around him, Dyas sought refuge in a nearby garden, where he encountered young local girl who had also been witness to the morning’s carnage.
Captain Dyas would suffer shrapnel wounds to the face, and was luckily treated by a medical officer who was able to remove the tiny shards of metal with a magnet. The presence of the medical specialist was a quirk of fate; had his injuries not been treated as quickly they had, Dyas would surely have lost his sight in both eyes.
Like most experienced commanders, the Yeoman captain was standing in an open turret; had he decided on closing the hatch, he would have met almost certainly the same fate as his crew.
Michael Wittmann and his crew must have been surprised by the ease of their advance towards the centre of Villers, and at that point the Waffen-SS Obersturmführer probably thought that he could capture the entire town by himself. Wittmann could have easily quit while ahead and turned back towards Point 213 – but he made the decision to push on.